


Loading


August 02, 2021
Whiteboarding is the practice of gathering a team together and filling a big blank space with as many creative ideas and innovative solutions as possible. You’ll need a dry erase board, tear pad, or your computer if you’re whiteboarding remotely.
To maximize your team’s chances of whiteboard or brainstorming session success, it’s good to prepare in advance — just a few easy steps can make the session more engaging, organized, and productive.
Miro is the collaborative online whiteboard platform that gives you countless tools to inspire creative ideas and infinite space to capture them. Whether your remote team uses a digital whiteboard or you want to have a more traditional in-person brainstorm, here are some tips and tricks to help you fully prepare for your next whiteboarding session and make sure great ideas are generated and captured.
Let's look at the tips in terms of before, during, and after a whiteboarding session:
Creative thinking is the goal of whiteboarding, and no one wants to rein it in. But it’s also important to keep all that thinking focused on the topics at hand and make sure you cover every essential topic in the time you have.
Prepare a detailed agenda ahead of time that lists out the ideation buckets or topics, and assign a certain amount of time to spend on each. Build in time for brainstorming ideas and time to discuss, rank, and organize those ideas.
Be sure all stakeholders have access to the agenda ahead of time and encourage them to come in with their own rough ideas and thought starters.
When it’s your job to set up and conduct ideation sessions and brainstorms in person, you get into a rhythm and know how you like to run things. But the online space is something different. When whiteboarding moves from the physical war room to a virtual platform, there’s a learning curve — even for (or perhaps especially for) the most experienced brainstorm facilitators.
If this is one of your first digital whiteboarding sessions or your first using Miro, take some time beforehand to get comfortable with navigation. Zoom in and out of areas and practice selecting and adding new items. Use your cursor to explore the different functionalities that the whiteboard app has to offer. Make sure you’re able to drive around the Miro board with ease.
Then, establish some sequencing — in other words, identify where on the board you want to take your collaborators next based on the topics or goals you need the session to cover and know how much time you’ll want to spend on each.
See how easy it is to navigate your Miro board.
You might be searching for ideas for how to improve your product or streamline your process. Or want to map out your customer journey to figure out how to deliver a better user experience. Or maybe how to launch a new service in a crowded market. In terms of your goals and objectives, no two whiteboarding sessions are alike.
Getting started is easy with a ready-made template that’s designed and organized for your specific session goals. (If you need more inspiration, have a look at Miroverse for thoughts and ideas from our enthusiastic user community. You can also use the template Dialpad created for having painless and effective stand-ups.)

To recap, first identify what you want your whiteboarding session to achieve, then pick the template that’s designed and organized for your specific needs.
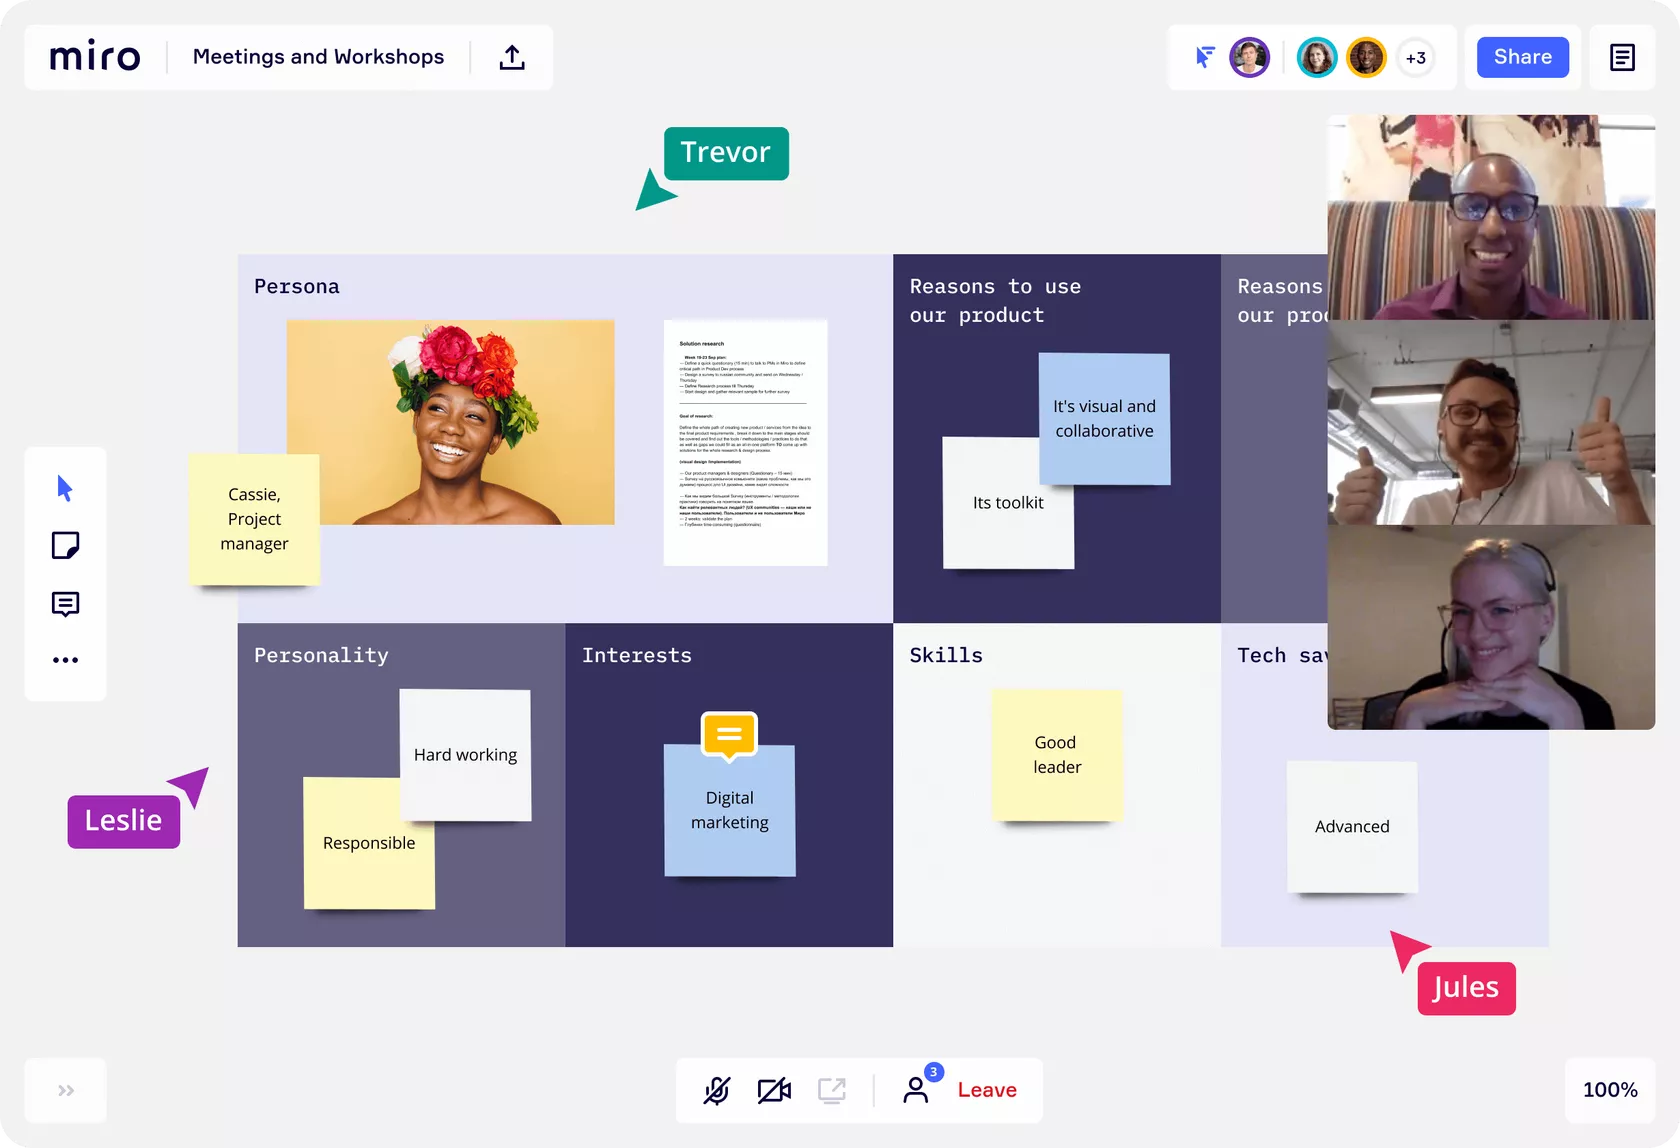
Text is an important feature for any whiteboard space. Especially for remote work, it should be easy and intuitive to add large, bold section titles for all the topics you want to cover — and to adjust the font, size, and color of the text to reflect the team or company’s style.
You can add text in two easy ways in Miro — either by using text boxes or by adding sticky notes. Sticky notes (just like what you’re used to placing right on a physical whiteboard) will give you and your team a fun, familiar way to ideate, build on each other’s ideas, and organize them into buckets.
Explore all the ways you can add text and content in Miro.
Perhaps you have certain remote collaboration tools you already love using (like Dialpad Meetings for your video conferencing and screen sharing needs) to help you accomplish specific things — like conducting video calls, tracking tasks, or accessing files.

Miro works with those tools seamlessly. We offer 70+ integrations to choose from, so you can move your whiteboarding sessions online and still run them just the way you’re used to running them.
Now that you’ve put time and thought into preparing for your whiteboarding session, inviting the guests should be secure, quick, and easy. No tracking people down, and no troubleshooting at the start of the session.
When using a virtual whiteboard, Miro makes it simple to send out invites and gives you permission settings to securely and easily choose your collaborators — and rest easy knowing only approved invitees will be there.
There’s even a Google Calendar extension so your guests can access Miro boards right from a calendar invite. No need for you to copy and paste board links for your remote meeting.
Check out this quick video on how easy Miro makes it to collaborate:
The best brainstorm setting is where team members are all comfortable with each other, and there’s a certain levity in the air. Sometimes it’s there from the start. Other times you have to create it.
A quick icebreaker exercise builds comfort in the room and gets creative energy flowing. It can be as simple as asking the group a simple question:
What was your worst job?
What historical figure would you want to have dinner with?
You have to change your name — what’s your new name and why?
Go around and enjoy everyone’s answers. Then get the whiteboarding going.
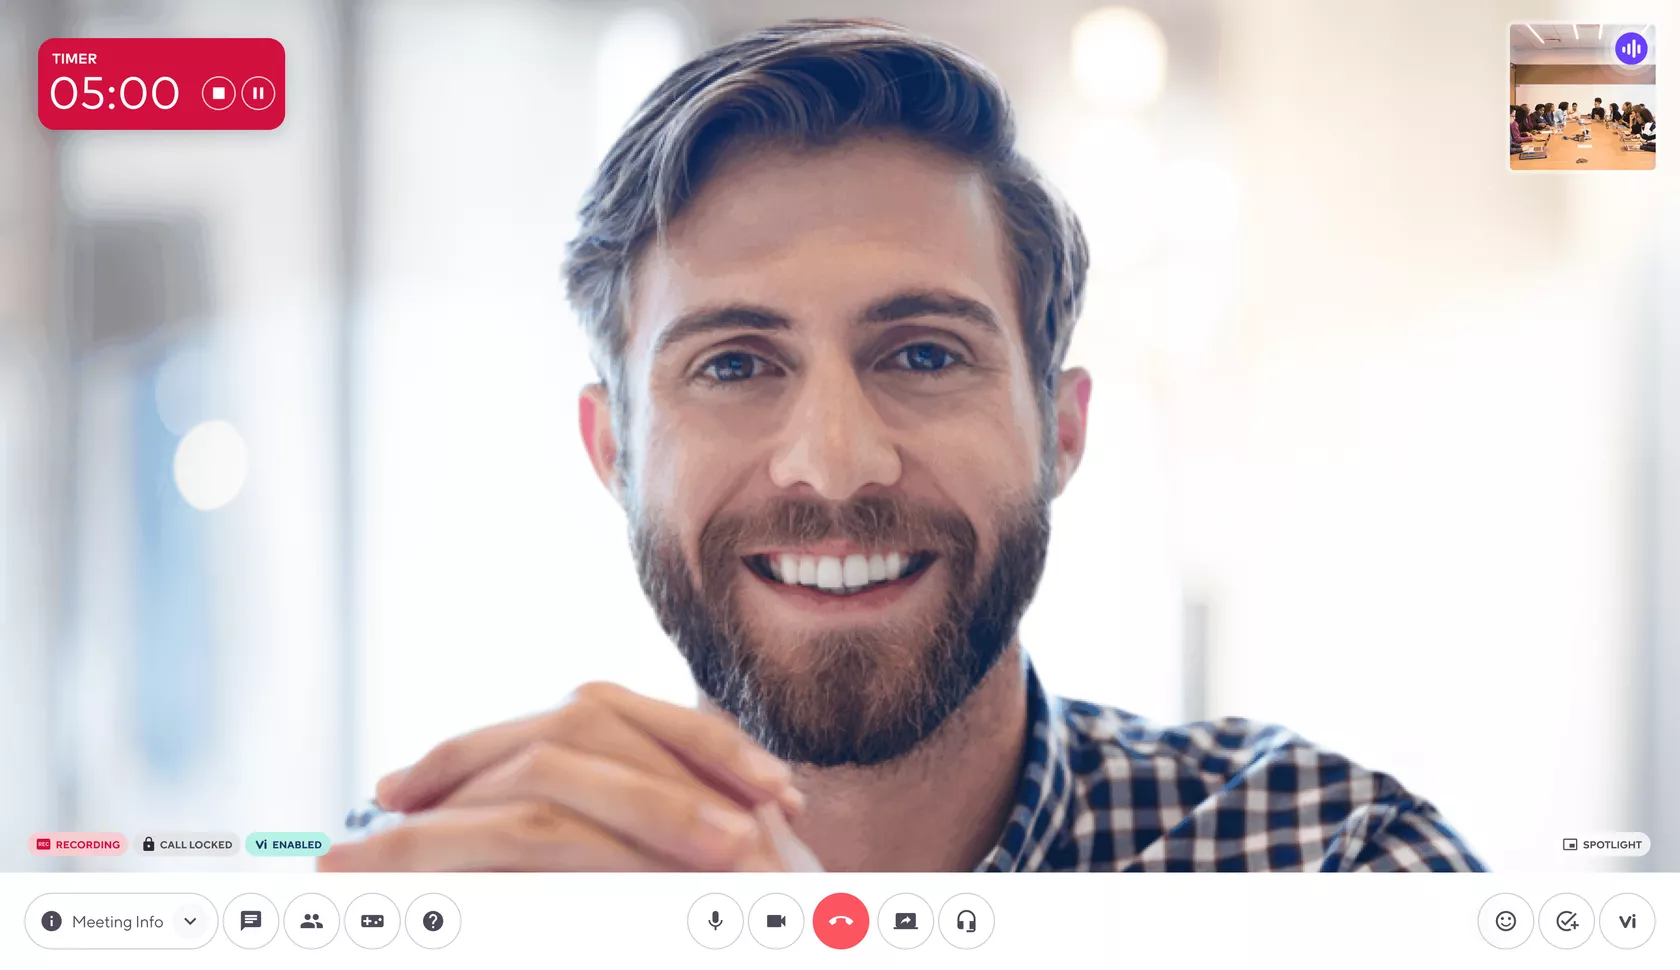
Want a great way to keep your session running on time? Use an actual timer. Once you give your team the topic to noodle on, say “Go” and start the clock.
Be sure to let them know when there are five minutes left, then one minute left, so they sharpen and rank their own ideas. Then it’s pencils down.
If you’re running an online session using Miro, we have a countdown timer to help you keep everything moving forward.
👉 Dialpad tip: If you’re using Dialpad’s Miro integration and have Dialpad Meetings Business, you can turn on Dialpad’s meeting countdown timer to get a 5-minute reminder for when you should start wrapping up your whiteboarding session. |
Many great creative thinkers thrive around the whiteboard. But other team members might feel put on the spot, and a little self-conscious, in that setting. They might start to withdraw, leaving things to the other (louder) voices in the room.
Be sure to seek ideas and input from team members who have had less to say, and create a few moments for people to think quietly and write. (That’s where you’ll find some of the most astute insights and sharpest feedback.)
Miro gives you a few great tricks and tools for real-time, cross-team collaboration across different users, like sticky notes and voting exercises.
There might be no bad ideas in a whiteboard session, but some ideas may be better than others. It’s important to select the best ideas (which you might have done at the end of the session itself). Miro makes this easy with Clusterizer, a feature that automatically affinity-clusters your many sticky notes to help you see patterns and themes to organize and group ideas.
Then you’ll need to make sure the teams know how to develop or implement those ideas going forward. In Miro, you can turn the stickies into cards — simple assignment sheets that let team members know just what to deliver and by when.
👉 Dialpad tip: For more tips on having better meetings, learn more about how to run more productive virtual meetings and how to make sure your stand-ups are an effective use of time. |
When it comes to whiteboarding, success is in the setup. Taking a few key steps and applying the right techniques beforehand will help you make sure the session yields plenty of brilliant ideas — and Miro is specially designed to make the video conferencing setup easy and fun. Keep in mind that it may take a few iterations to perfect the ideal whiteboarding process for your team.
Dive deeper into what Miro can do at a free, live training webinar with Miro educators to see how you can integrate a remote whiteboarding tool into your workflow. Happy whiteboarding!
Tired of unproductive brainstorming? Improve your brainstorming sessions with Miro and Dialpad Meetings.
Try Dialpad Meetings For Free